I use revision control systems for almost all of my software development, deployment, and server configuration. When using Subversion there is, technically, no difference between a working copy on my personal or development machines vs. a working copy on a production server. (Yes, you need a working copy on the production server, because exports cannot be updated that easily.) However, modifications of the checked out code or config files on a production server can cause problems with the next round of updates. Sometimes you just don’t notice that there are conflicts that need to be resolved.

To make sure I notice when a colleague or I have fallen back into the bad habit of changing things on a production server directly, rather than checking in changes to the repository, I have created a Nagios Plugin: it’s called “check_svnstatus”

Click here to download the plugin and to see an example configuration

I’m using the post-commit hook to send out E-mail notifications when changes are committed to Subversion repositories.

If you search the web you’ll find a ton of scripts in various languages for this purpose. They all do more or less the same thing: create an E-mail message for the commit, including such details as the revision author, number, timestamp, a list of the paths that were changed, and a diff of the changes.

For one particular project I wanted the diff as an attachment, though, rather than inline in the message text. So I ended up writing my own script. It’s a Shell script that should work on most Unix/Linux based systems.

Click here to view the source code and installation instructions

Webduino, the web server library for Arduino, now supports HTTP Basic access authentication. You can download a .zip file of the latest version from GitHub. (Note: The download link does not point to a specific version, but always to the very latest version of Webduino including features and/or bugs that were added/fixed after I wrote this post. Here’s the front page of the GitHub repository.)

Authentication means that you can now protect the web-enabled functions of your Arduino with a username and password.

There is at least one other version of Webduino supporting authentication, written by Claudio Baldazzi. It’s in this post on the original Google Project site of Webduino, with an example here. When I started working on improvements of the Webduino, plus new features for my own use, I considered using Claudio’s version but decided against it for the following reason:

With the Claudio’s version all pages of the Arduino would be protected by the same username and password. However I wanted a way to distinguish different user levels. E.g. Person A should be allowed to see on the web whether the lights are on or off, but only Person B is allowed to flick the switch.

Here’s how I did it.

The WebServer class now has two new methods: httpUnauthorized() sends error 401 back to the client, which in the case of a regular web browser causes the user to see a prompt for username and password. checkCredentials() checks whether a username and password have been sent with the request and whether they are valid, i.e. they have certain values. In a Webduino command function you should first run checkCredentials() and depending on the return value either run your “protected” code, like turning on the lights, or fire httpUnauthorized(). See the methods’ subpages of the API documentation for example code.

As reported earlier I had been given an Arduino Uno. I subsequently received my Ethernet Shield to hook the board up to the network. I’m clearly heading towards the Internet of things… Although I am still not 100% certain about what I’m going to do with the board (or how many additional ones I am going to have to buy) one things is pretty clear: It will have to be controllable and/or configurable over a web interface.

I found the Webserver example that ships with the Arduino IDE to be rather dull and unflexible. It wasn’t long before I stumbled upon Webduino, a very flexible generic Web Server library originally written by Ben Combee. The Webduino project homepage on Google Project Hosting points to this GitHub page. I downloaded the version adapted to Arduino 1.0 and started hacking away. Let me say this now: Webduino does meet my expectations.

However after a short while I ran into problems. None of them were to blame on the library, but rather on myself, but that’s actually not the point of this post… When I ran Wireshark to look at the data going over the network I noticed that for every page loaded Firefox also tries to download favicon.ico from the web server. Since Webduino sends a 400 error back on any requests for resources that have not been defined Firefox just keeps retrying forever.

At around the same time I discovered that, to avoid excess traffic from robots, there is a default robots.txt built into Webduino. So I decided to add a default favicon.ico, based on the icon used in the “Web_Image” example that ships with Webduino. Now when the first page is requested, Firefox loads the icon file, which actually eats more resources than one 400 error, but it pays off down the road when Firefox caches the icon and does not request it again, saving the Arduino from having to generate many 400 errors…

Webduino "Hello World!" page with favicon.ico

Webduino "Hello World!" page with favicon.ico; this is the default favicon.ico in my version of Webduino

And since I see projects hosted on GitHub as an open invitation to fork I ended up with my own Webduino project on GitHub. Feel free to look at the code, to fork, clone, whatever (MIT license), and to let me know what you think! (Oh, and I gave the readme some TLC and also added a keywords.txt file for syntax highlighting.)

Update: I started to write a “beautiful” API documentation

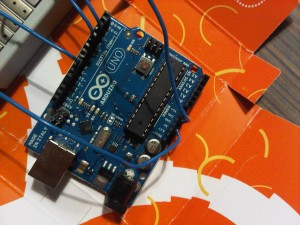
I found an Arduino Uno under the X-mas tree:

Arduino Uno

I’m still waiting for my Ethernet Shield to ship. In the meantime I wanted to get started with some of the “simple” stuff like controlling single LEDs, triggering events using pushbuttons etc. It came in handy I still had my 1980’s “Kosmos electronic X3000” workshop kit around, which I used to experiment with when I was a teenage nerd:

Kosmos electronic X3000 workshop

I guess I’m still a nerd: My heart jumped a bit when I found out they seem to still sell these things.

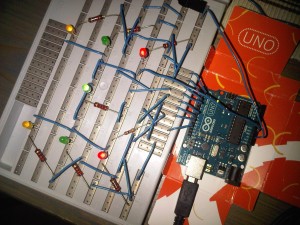
Here’s what they look like in combination:

Arduino Uno with Kosmos "breadboard"

You and I know that talking about new ideas prematurely is the best way to kill them. Anyhow you should expect some Arduino related posts over the next year or so…

Some of my clients are using their WordPress installs with pages only, i.e. without any posts, and with comments turned off completely. This is often referred to as “WordPress as a CMS”. To free the screen from clutter I like to remove the comments link from the new/revised WordPress 3.3 Admin Bar. I also usually change the “+ New” link to default to creating a new page instead of creating a new post.

To accomplish this you can drop the following lines into your theme’s functions.php file:

<?php
function my_admin_bar_menu( $wp_admin_bar )
{
  $wp_admin_bar->remove_node( 'comments' );
  $newpage = $wp_admin_bar->get_node( 'new-page' );
  $wp_admin_bar->add_node( array( 'id' => 'new-content', 'href' => $newpage->href, ) );
}
add_action( 'admin_bar_menu', 'my_admin_bar_menu', 100 );

To find out more about the Admin Bar API you should check out this post by Andrew Nacin on the official WordPress Development Blog.

Since the upgrade to version 3.2.2 Nagios does not update the host alias macro when the configuration is reloaded. Macros are the variables used in commands, such as notification commands, i.e. the information you receive via E-mail when there is a problem with your hosts or services.

As long as you don’t change your host alias information you will never notice. I did change it and I found myself scratching my head for some time, especially since the same information does get updated in the web interface.

I found a greater number of forum discussions relating to this, but none seemed to offer a practical solution for larger scale environments.

After some pondering I came up with these lines:

service nagios stop
cp /usr/local/nagios/var/retention.dat /usr/local/nagios/var/retention.bak
grep -v ^alias /usr/local/nagios/var/retention.bak > /usr/local/nagios/var/retention.dat
service nagios start

They do the trick in my installations.

Update: Here’s a brief summary of the error and what the script does to work around it.

When Nagios parses the configuration and finds a new host it loads the alias field into memory. When Nagios reloads the configuration, the alias information that is already in memory does not get updated. When Nagios stops (or before reloading the configuration) the alias information in memory is dumped to the retention.dat file. When Nagios isn’t running and you start the service, it doesn’t load the alias information from the configuration files but from retention.dat, unless that information is not present in the file. So my solution does the following:

  1. Stop Nagios
  2. Make a backup copy of the retention.dat file (Note: I’m copying the file instead of renaming it to make sure that it will still have the same owner/group and permissions when I write to the original file in the next step)
  3. Strip all lines starting with “alias” from the backup file and overwrite the original retention.dat file with this data
  4. Start Nagios

You may have to tweak the file location for the retention.dat and backup files. You may also need to change the commands that stop and start the Nagios deamon.

The next version 1.1 of my Open Graph Pro WordPress Plugin will feature an API (a public method and two filter hooks) that can be utilized by theme and plugin developers who would like to add “Like” buttons to their blogs. The API also allows you to add Custom Object Types.

If you want to test-run the API go to the Open Graph Pro download page and grab the Development Version. The API is not going to change anymore. The code is also pretty much final. I’m merely working on some final UI touches and i18n/L10n of the plugin.

Code snippets for adding “Like” buttons or using Custom Object Types are part of the API documentation.

I just released version 0.4.2 of my Comment E-Mail Verification WordPress plugin. Most important change: verification codes are no longer being generated (and thus no longer cluttering up the database) for trackbacks and pingbacks. Thanks to Joost de Valk who contributed a few lines of code that ultimately took this important aspect off my todo-list.

As always: Download it directly from the wordpress.org plugin directory!

So I’ve been playing around with Google+ for a little. And then +Lars Becker actually made me “Send feedback” to Google… seems that they have a little problem with their privacy settings:

If you hide who’s in your circles from your profile page, but then post something to a circle, people can click on the word “Limited” above your post and see a list of people who you’ve shared this post with, i.e. a list of the people who are in your circle(s).

If you’re on Google+ please click the “Send feedback” in the bottom right corner and let Google know so they can fix this ASAP!

If you want to add me to your circles, here’s my profile: +Martin Lormes (get used to the “+”!)

BTW: +Lars Becker also made the point that given enough posts to varying audiences one could even find out who’s in what circle (except for the names of circles, but the groups will be self-explaining I guess).

« Older entries § Newer entries »